Moving your website to 1smart.link from another host: what to do, in order
Moving your website to 1smart.link means pointing your own domain at your new website. If you do things in the right order, your email keeps working and your website switches over cleanly. This page is the order to follow. Each part links to a detailed guide.
Note: Every member's records are different. Always copy the values shown in your own Website tab or your email provider's setup page, never values from a picture in our guides.
First: set up your email
If you use an email address on your domain, such as info@yourdomain.com, sort out your email before you switch anything else. Moving your domain away from your old host can stop your old mailbox from receiving mail.
Set up your new email with a provider of your choice. Setting up free business email on your domain with Zoho Mail and Using Google Workspace for email on your domain take you through two common choices.
Before you switch, export or save anything you need from your old mailbox. Old mailboxes and the mail in them do not move across on their own.
Warning: 1smart.link hosts your website, but it does not host email mailboxes. Your email always lives with an email provider.
Next: set your nameservers back to your domain company's default
Your domain's nameservers decide where its records live. If your old host asked you to change them, set them back to your domain company's own default nameservers. Your records will then be added at your domain company.
Each guide also has a section for other domain companies.
Then: add your domain in the Website tab and copy its records
Warning: A domain for your website goes in the Website tab, never on the Domains page. The Domains page is only for short links and QR codes. A website domain added there will not reach your website.
In your dashboard, open Website and choose your website. Under Addresses, click Use my own domain.

Type your domain without www, for example mystore.com.

Click Add domain.




Your domain is now listed under Addresses as pending, with two records to add at your domain company: an A record for @ and a CNAME record for www.
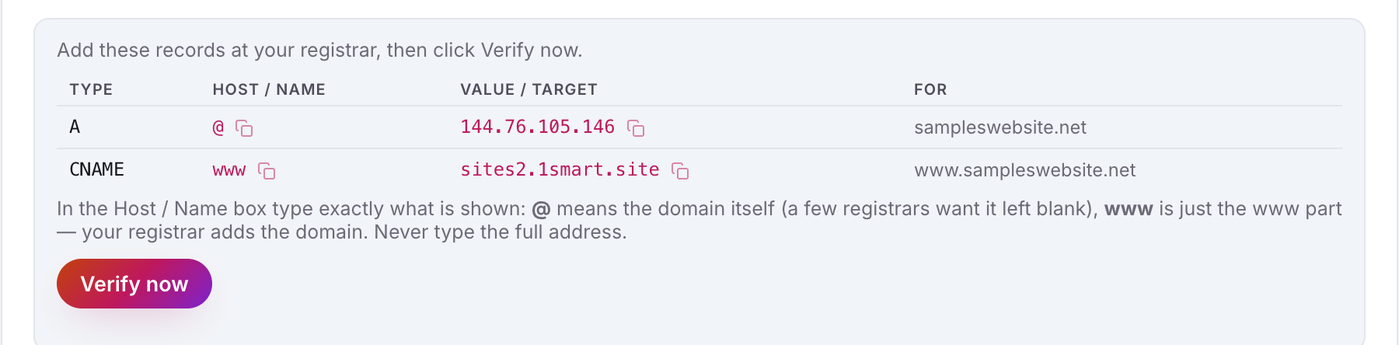
Example only. Your values will be different.
Add both records at your domain company, exactly as your Website tab shows them. The registrar guides above show every click.
Tip: If your domain is already listed under Addresses as pending, you do not need to add it again. Use the records it shows.
At the same time: add your email records
While you are on your domain company's DNS page, add the records your email provider gave you: usually MX records and TXT records (a verification code, SPF and DKIM). The registrar guides show how, and Setting up free business email on your domain with Zoho Mail shows where Zoho's records come from.
Warning: Remove your old email provider's MX records and its old SPF record, so only the new ones are left. A domain must have only one SPF record.
Then: click Verify now
Go back to your Website tab and click Verify now under the records.
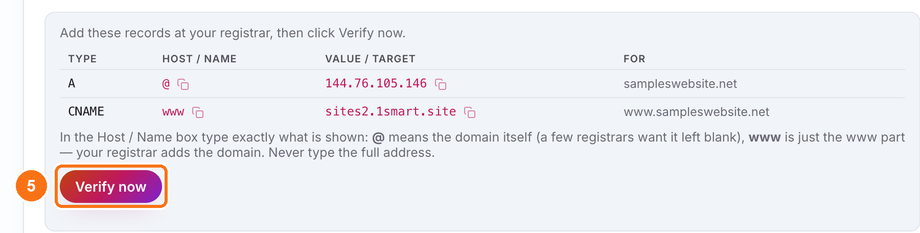
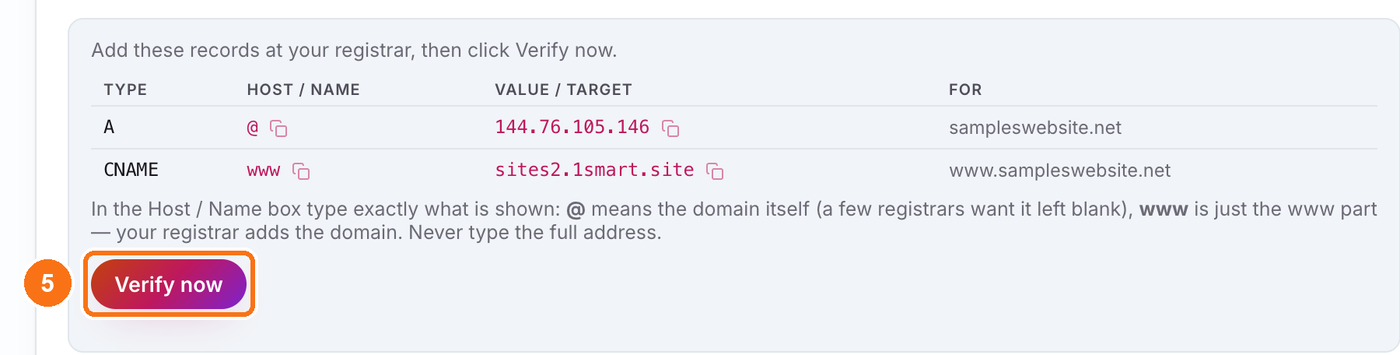
New records can take a little while to reach the internet. If the Website tab says the records are not found yet, wait and click Verify now again.
When your records are correct, your domain shows Securing while your website's security certificate is set up. This can take a little while too. You can leave the page.

After that: your domain becomes your main address
When it is ready, your domain shows Primary. It is now your website's main address, and your free address keeps working alongside it.
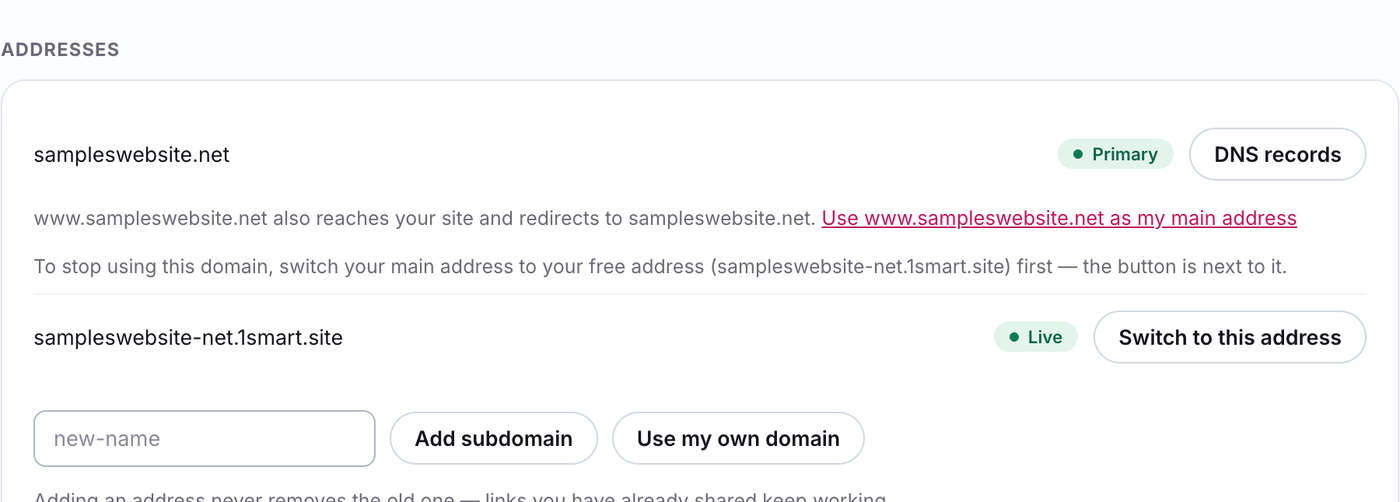
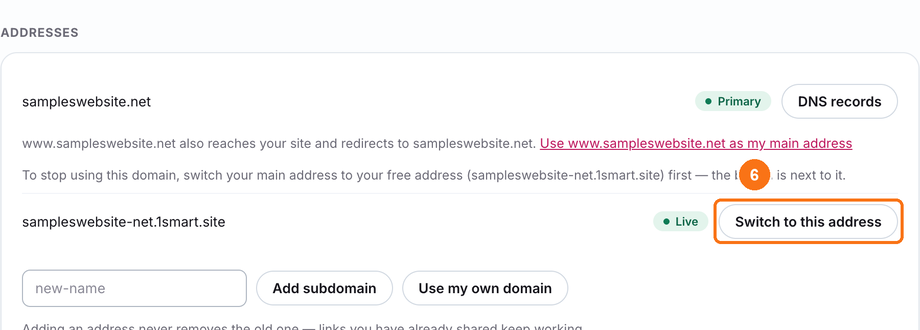
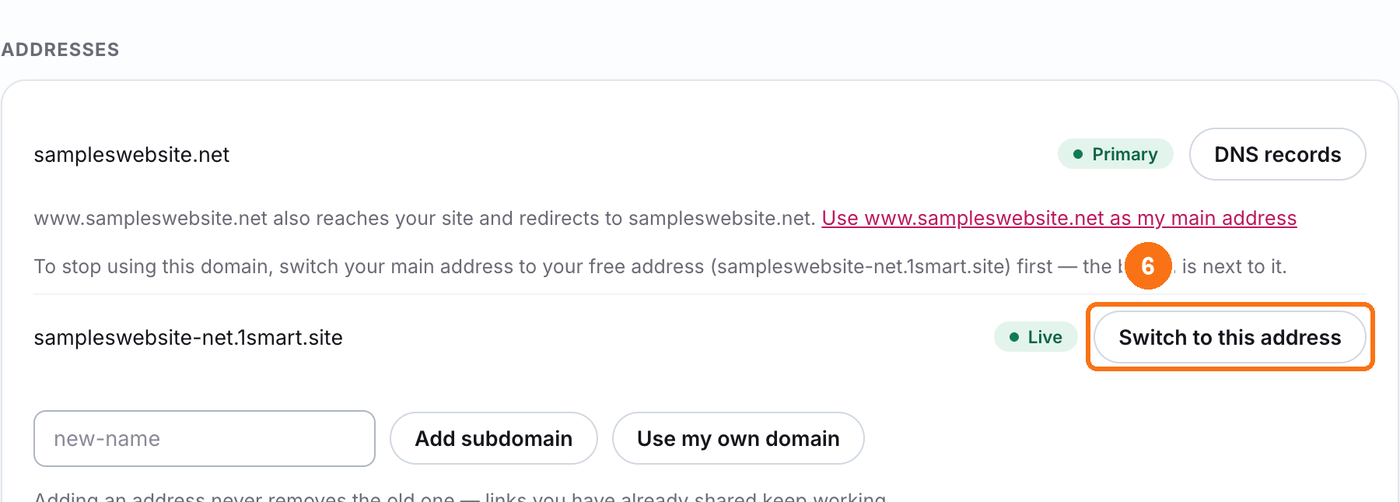
To make your free address the main one again, click Switch to this address next to it.
Finally: connect your website's email
Your website sends order confirmations, form replies and password resets. Connect it to your new email so these come from your own domain.
With Zoho Mail: Sending your website's emails through Zoho Mail
With any other provider: Sending email from your website
If something isn't working
My domain or email isn't working after the move covers the common problems, such as a domain stuck on pending, email not arriving and website emails not sending.