Adding DNS records and resetting nameservers at Hostinger
This guide shows you how to add DNS records for a domain registered at Hostinger, in Hostinger's control panel, hPanel. You would do this to point your domain at your 1smart.link website, bio page, short links or automation workspace, or to set up email with a provider such as Zoho Mail or Google Workspace.
Every step is one click or one copy and paste. The numbers in the pictures match the numbered steps.
Note: The values you add are different for every member. Always copy the values shown in your Website tab, or in your email provider's setup page. Never copy values from the pictures in this guide.
Before you start
Sign in to Hostinger's hPanel.
Keep a second browser tab open on the page that gives you the records to add. For a website, that is the Addresses section of your Website tab. For email, it is your email provider's DNS setup page.
If Hostinger shows a pop-up asking how likely you are to recommend it, close it with the X in its corner.
Find your domain
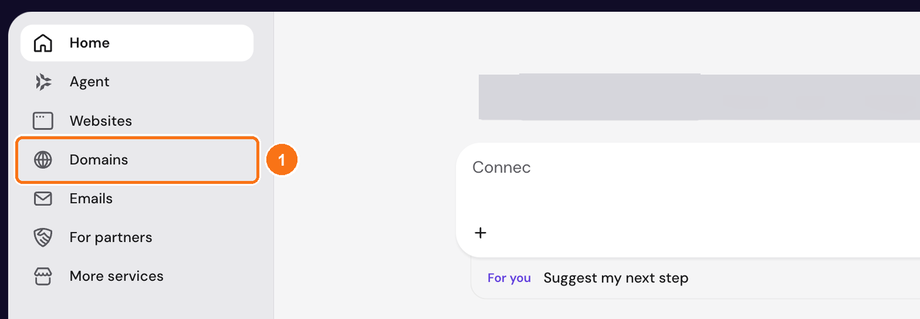
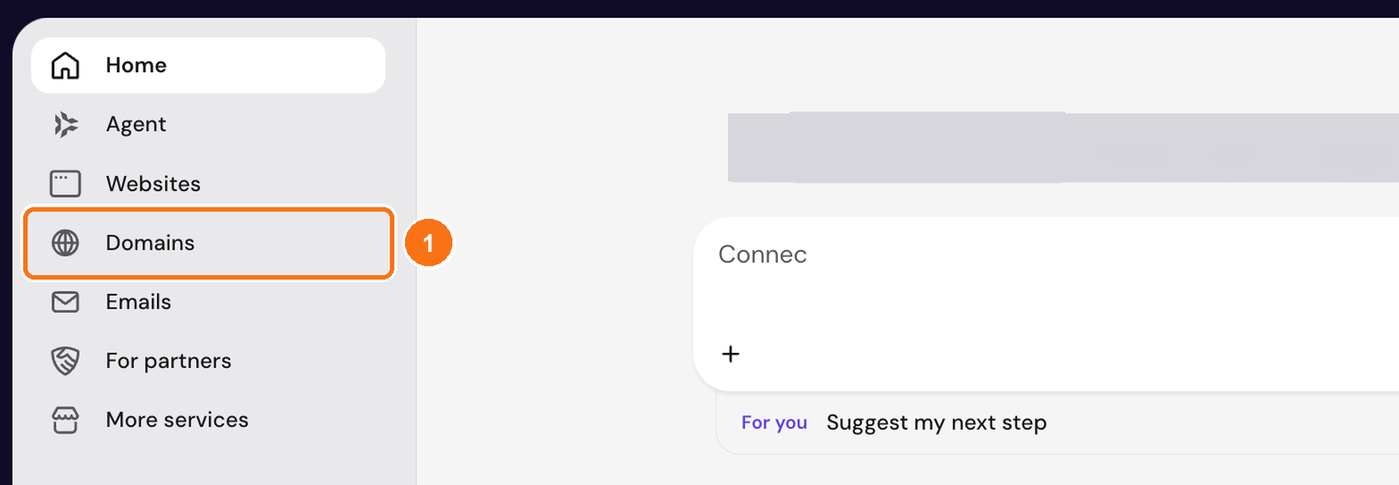
In the menu on the left, click Domains.
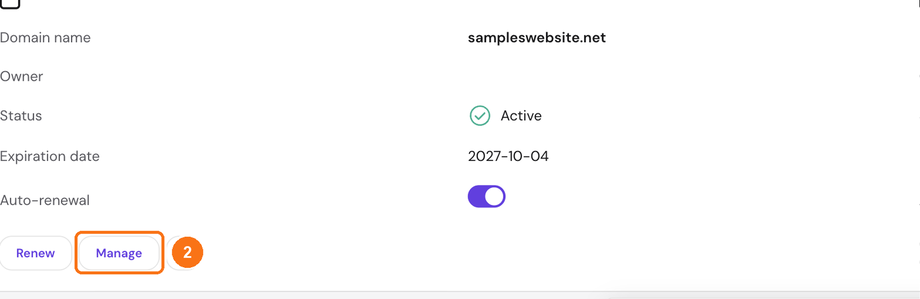
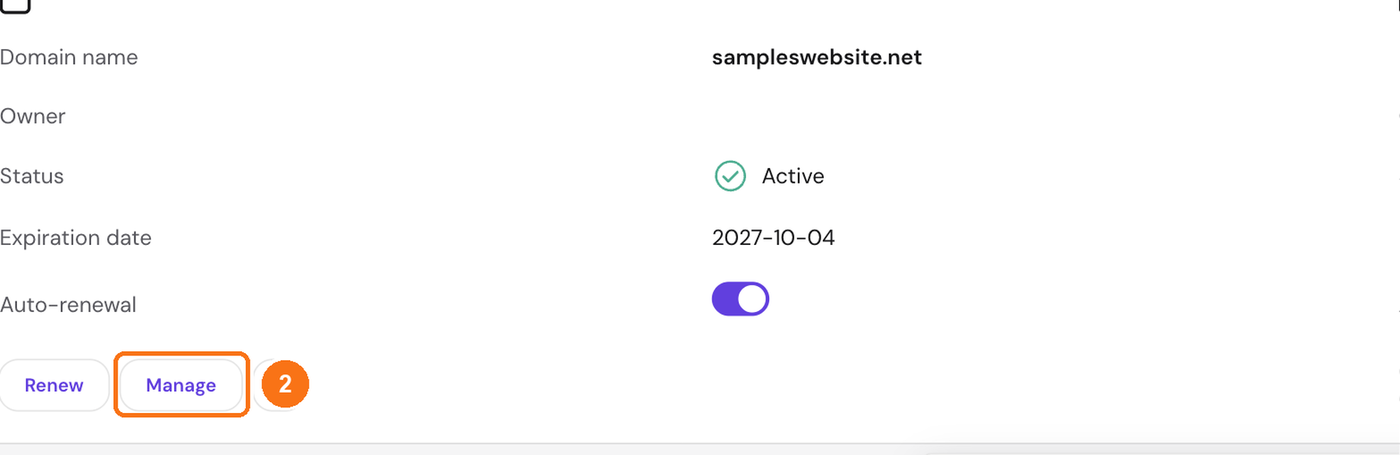
Your domains are listed under Domain portfolio. Click Manage next to your domain.
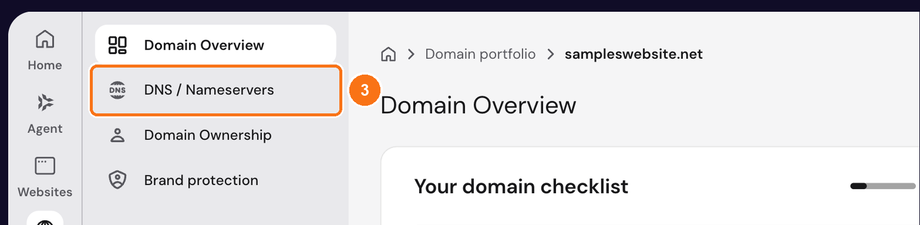
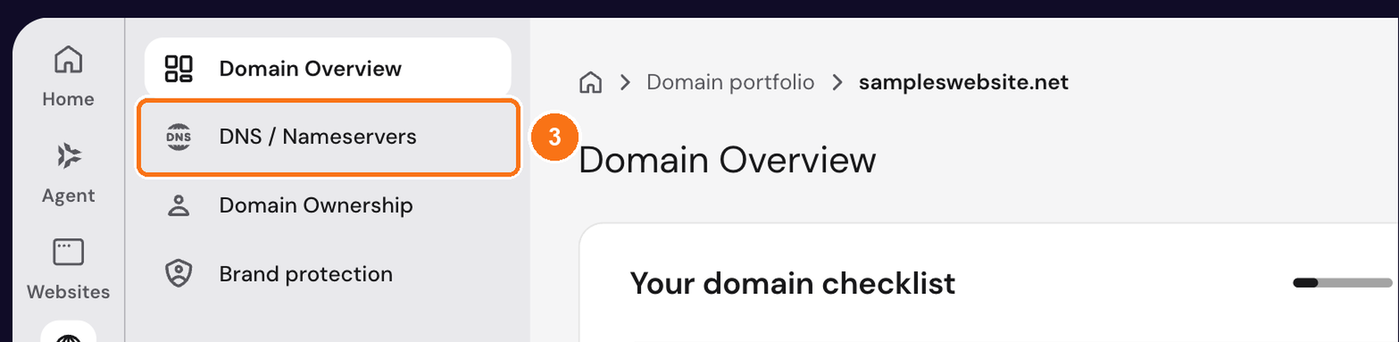
In the domain's menu on the left, click DNS / Nameservers.
Check the nameservers
Your records only work when your domain uses Hostinger's own nameservers. If your domain was set up by another host, it may still point to that host's nameservers. Members are often told to "change your nameservers back to your domain company's default".
Look at the Nameservers box at the top of the page. Hostinger's own nameservers end in dns-parking.com. If yours do, there is nothing to change.
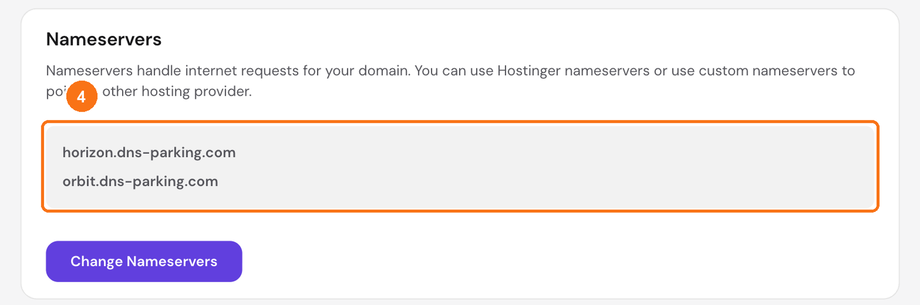
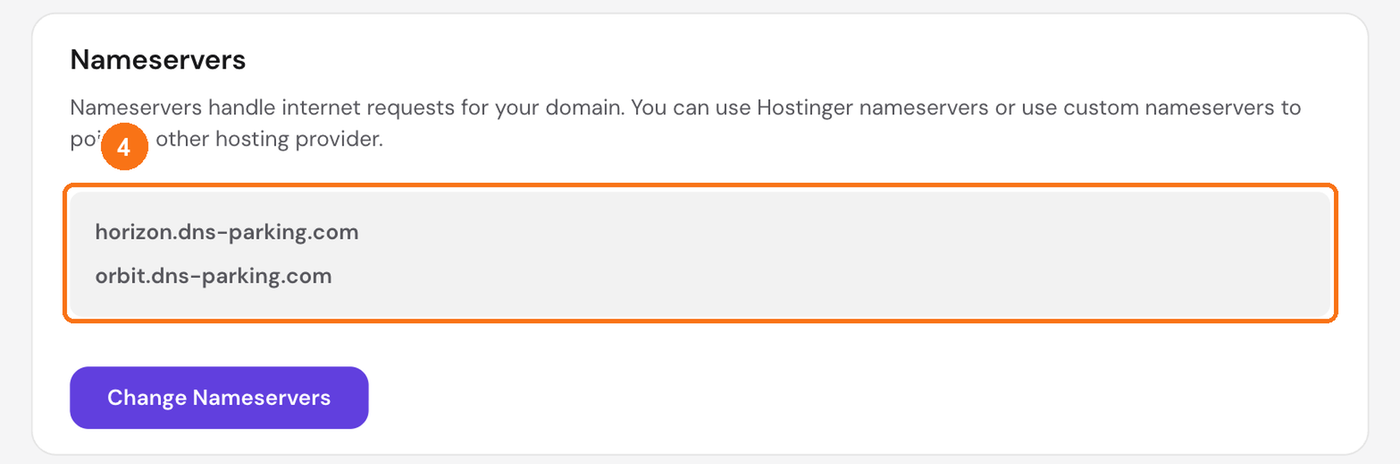
If the box shows other nameservers, click Change Nameservers and choose Hostinger's own nameservers instead of custom ones.
Warning: Do not type anything into the nameserver boxes. Codes from your email provider and values from your Website tab never go here. They go in Manage DNS records, further down the same page.
Note: A nameserver change can take a while to spread across the internet. Your other steps can go ahead straight away.
Remove records that would get in the way
Scroll down to the list of records. A Hostinger domain that has never been set up usually starts with an A record on @ and a CNAME record on www that point to Hostinger's parking page. Any record for @ or www that points somewhere else will stop the records you add from working. Remove them first.
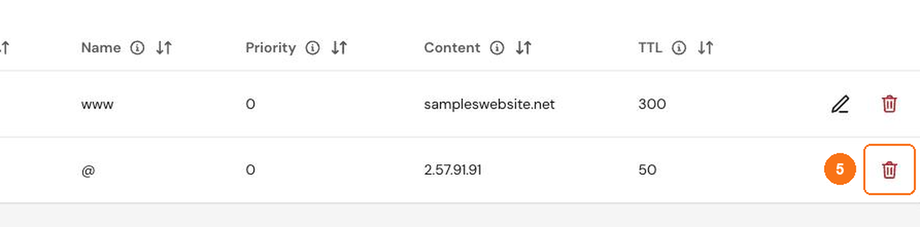
Click the red bin icon at the end of the A row for @.
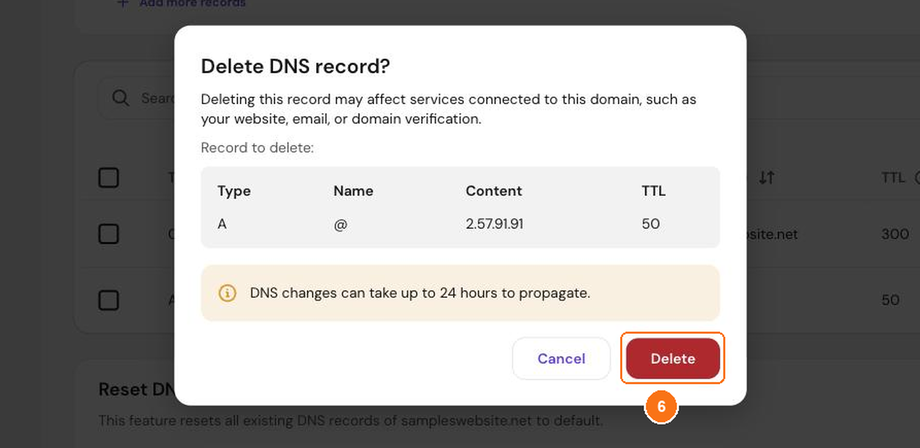
Hostinger asks "Delete DNS record?" and shows the record. Click Delete.
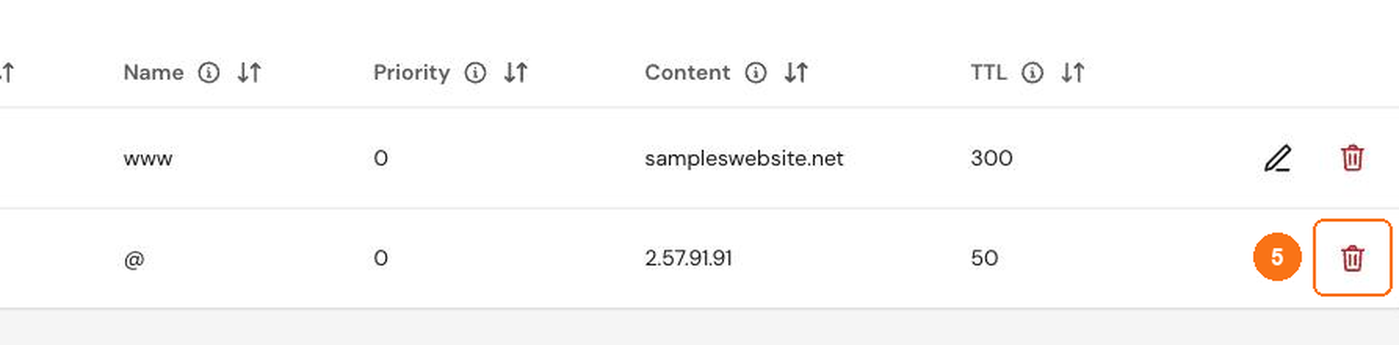
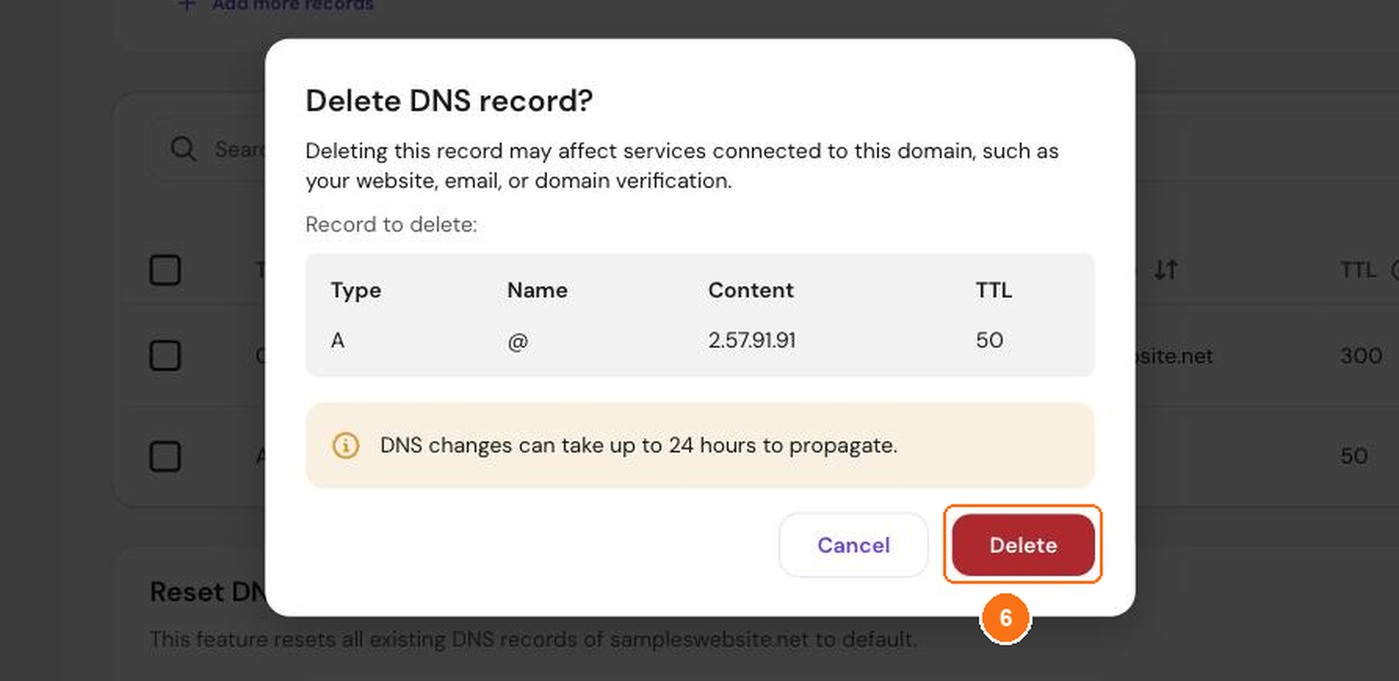
Do the same for the CNAME record on www: click its bin icon, then click Delete.


Tip: Only remove records on @ or www that point somewhere else. Leave other records alone unless the page you are setting up tells you to remove them.
Add the records for your website
Your Website tab shows two records: an A record for @ and a CNAME record for www. Hostinger adds records with the form above the list: Type, Name, a value box and TTL, then Add Record.
Click the Type box and choose A.
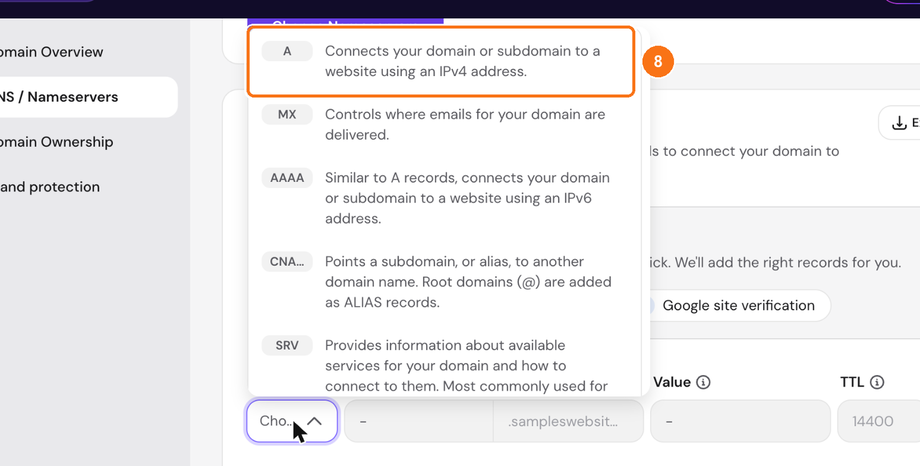
In the Name box, type @.

In the Value box, paste the value shown for the A record in your Website tab. The grey text already in the box is only an example from Hostinger; replace it.

Example only. Your values will be different.
Leave TTL as it is and click Add Record.

Click the Type box again and choose CNAME. You may need to scroll the list a little.
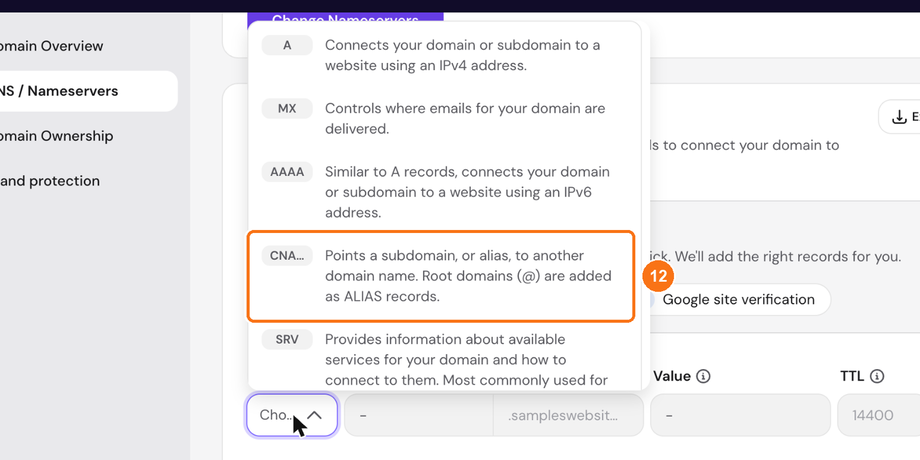
In the Name box, type www.

The value box is now called Target. Paste the value shown for the CNAME record in your Website tab.

Click Add Record.

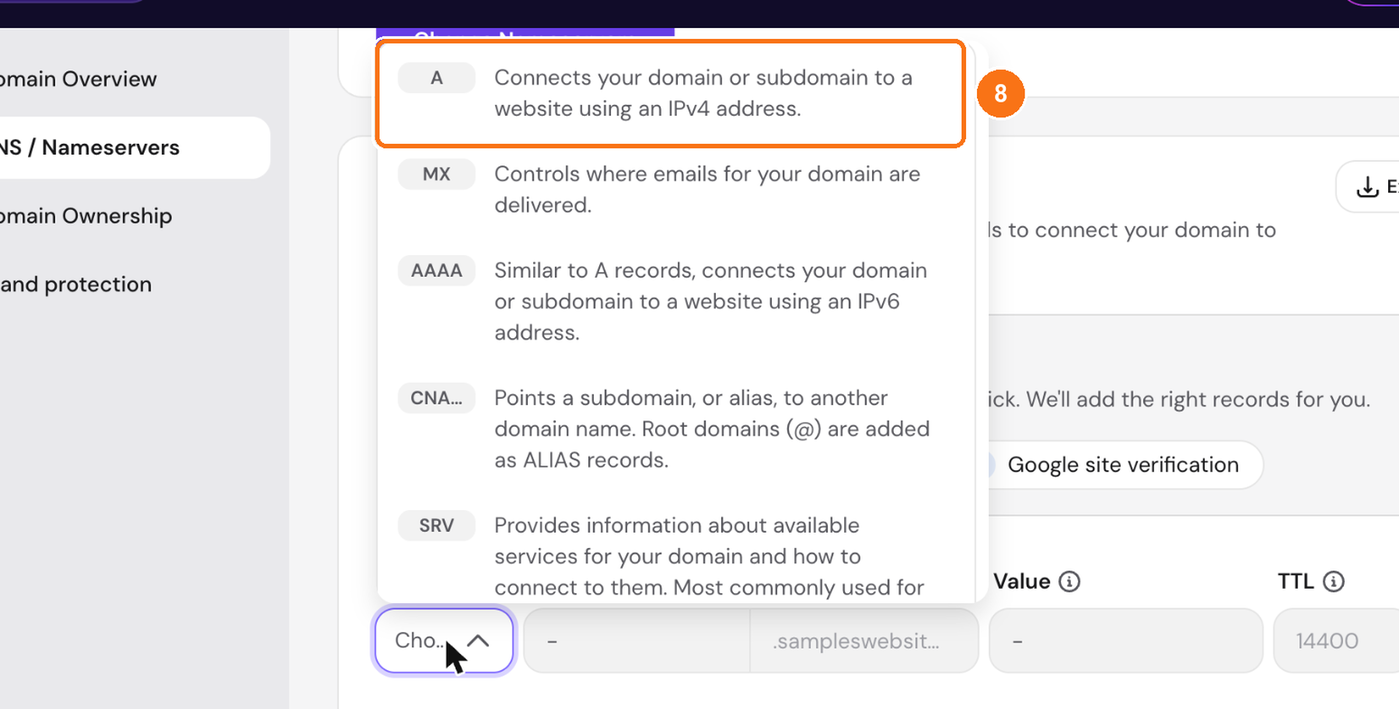



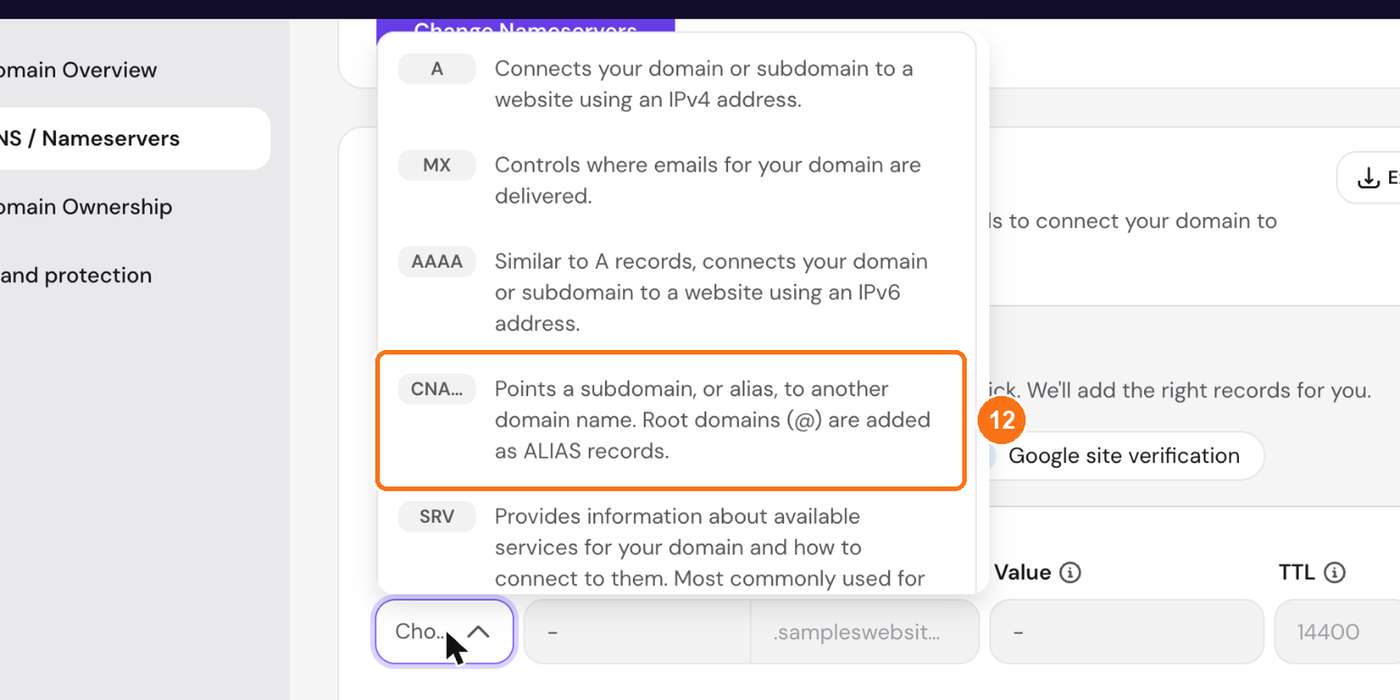



Your two website records are now in the list.
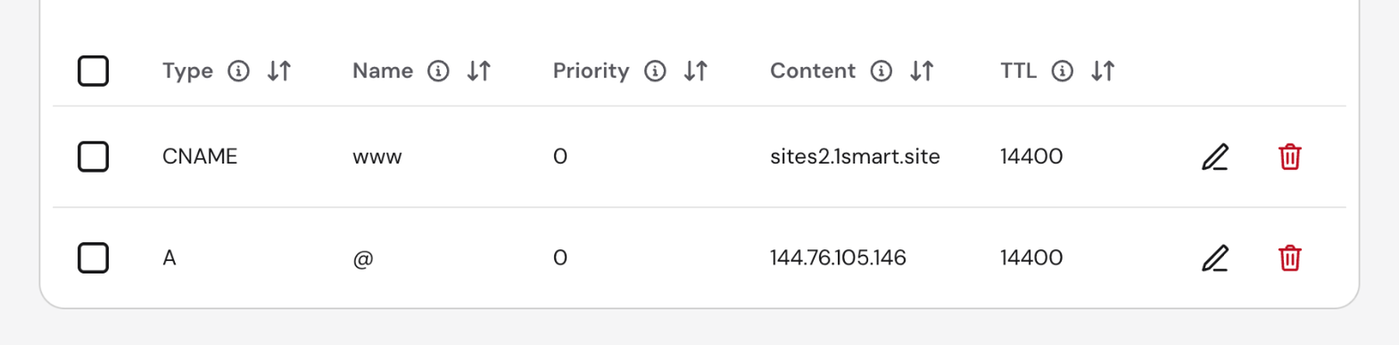
Note: The record appears in the list as soon as you add it. Hostinger's servers can take a little while to start answering with it, so give it some time before you click Verify now in your Website tab.
Add MX records for your email
Click the Type box and choose MX.
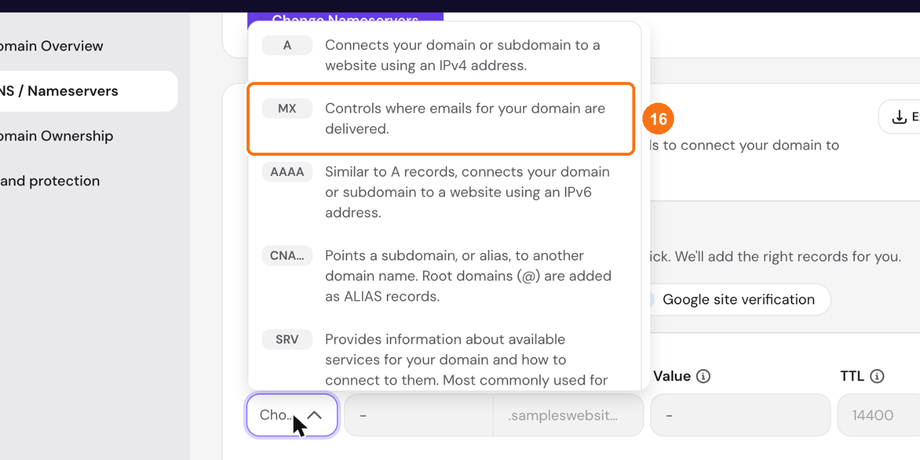
The form changes to Name, Mail server and Priority. Type @ in Name, paste the first mail server from your email provider into Mail server, and type its priority in Priority. Hostinger fills in 10 for you; change it if your provider shows a different number.

Click Add Record.

Repeat steps 16 to 18 for each further mail server, with its own priority. The form goes back to Choose type after every record.
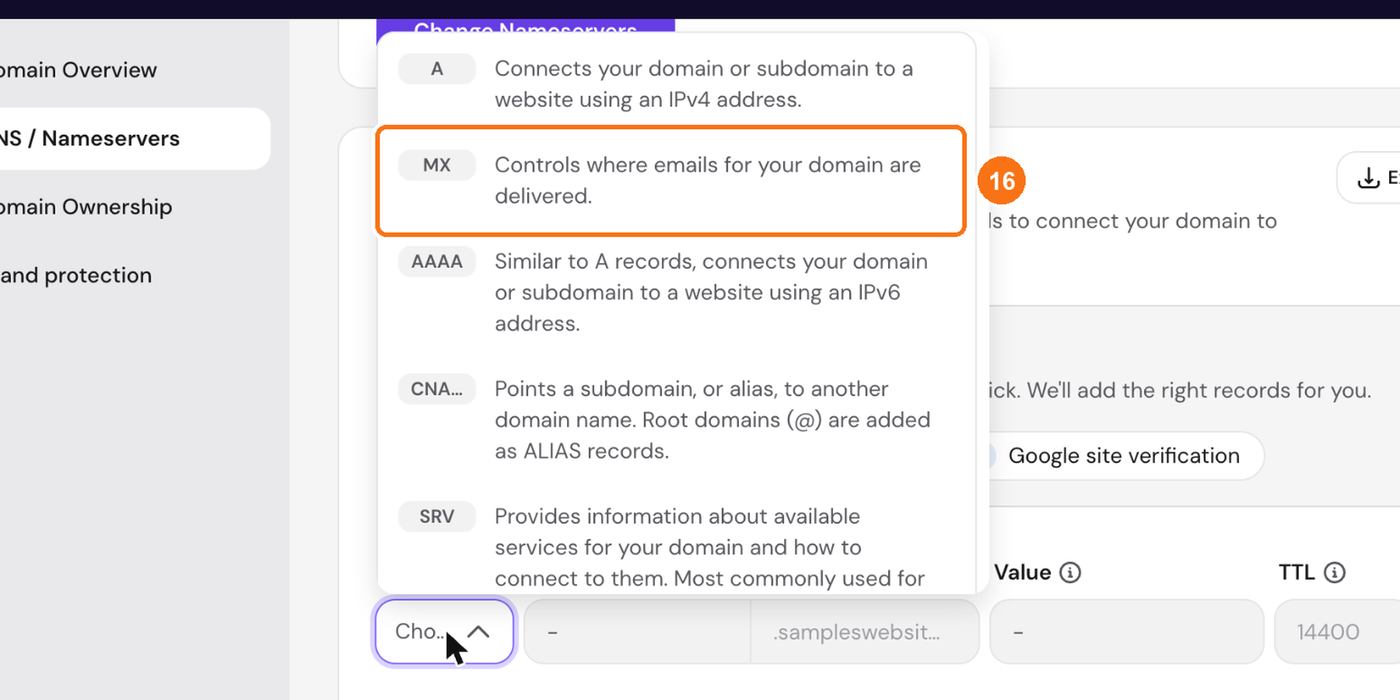


Warning: If your domain had email somewhere else before, do not copy its old MX records across. Remove any old MX records and only add the mail servers your email provider gives you now.
Add a TXT record
Email providers use TXT records to confirm you own the domain (a verification code), to protect your email (SPF) and to sign it (DKIM). They are all added the same way.
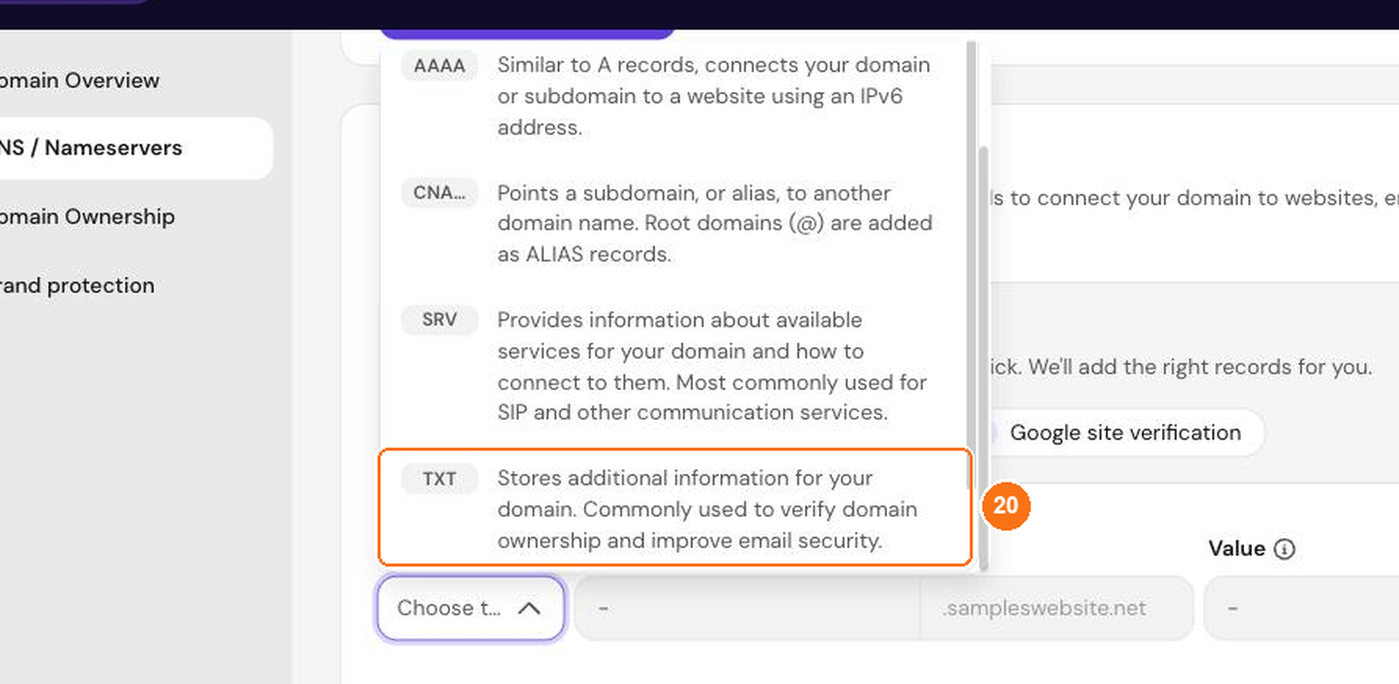
Click the Type box and choose TXT.
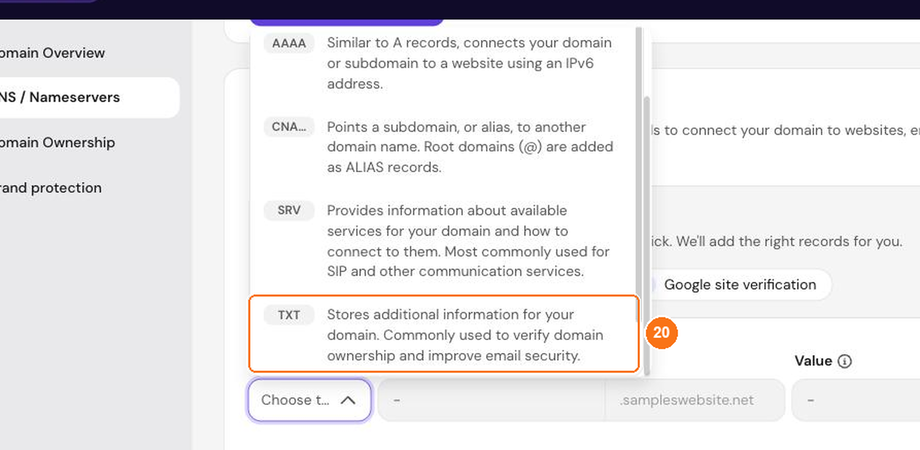
In Name, type the name your provider shows. For a verification code or SPF this is usually @. For DKIM it is a name ending in _domainkey. Then paste the value your provider shows into TXT value. The grey text already in the box is Hostinger's own example; replace it.

Click Add Record.



Repeat steps 20 to 22 for each TXT record your provider gives you. A DKIM value is long. Paste it in one go and check that nothing was left behind.
When you have finished, your list of records will look something like this:
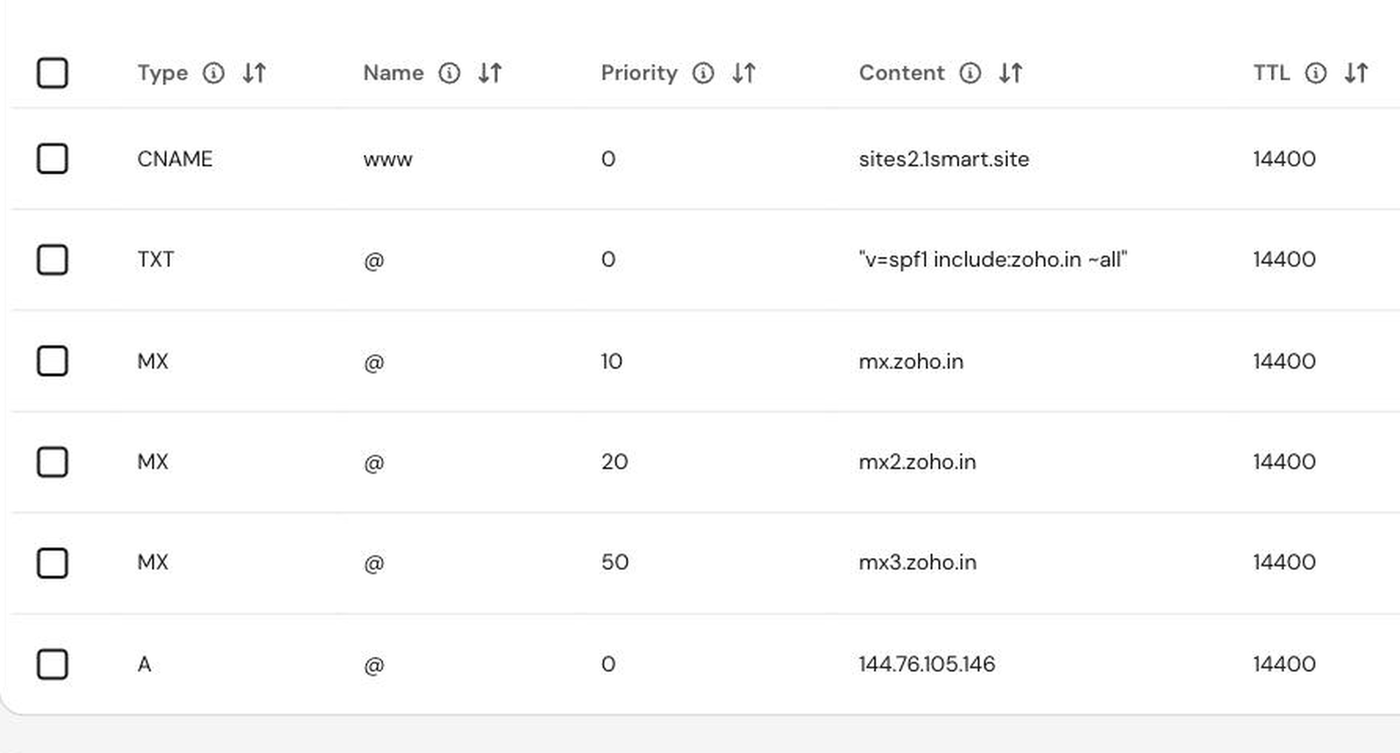
Warning: A domain must have only one SPF record (a TXT record starting with v=spf1). If you already have one, replace it rather than adding a second. Your email provider may show a combined value you can use instead.
Hostinger tips
The Name box. Hostinger shows your domain in grey after the box. Type only @, www or the name your provider gives. Never type your full domain name.
The value box changes its name. It is Value for an A record, Target for a CNAME record and Mail server for an MX record. They all take the value your Website tab or email provider shows.
Your record is in the list but does not seem to work yet. Hostinger's servers can take a while to answer with a record you have just added or removed. If the record is in your list, it is saved. Wait, then try again rather than adding it twice.
The Redirects tab. If you ever set up a redirect for the domain under Redirects, remove it, because it sends visitors away from your website.
Reset DNS records. The button at the bottom of the page puts back Hostinger's parking records. Do not use it unless you want to start again.
The domain is registered somewhere else. Hostinger lists it under External domains with a Manage DNS button. Records there only work if the domain uses Hostinger's nameservers; otherwise add them at the company where the domain is registered.
Using a different domain company?
The steps are much the same everywhere, but the names change.
Where the records live. Look for a page called DNS, Manage DNS, DNS Zone, DNS Management or Advanced DNS. It is usually inside your domain's settings.
What the boxes are called.
Box | Also called |
|---|---|
Type | Record type |
Host | Name, Host name, Hostname |
Value | Points to, Target, Content, Data, IP address, Mail server |
TTL | Time to live. Leave it on the default or Automatic. |
Priority | Only for MX records |
Ask your domain company to do it for you. Most domain companies have live chat. Copy this message, add your domain and your records where shown, and send it:
Hello, please add the DNS records below to my domain [your domain]. Please also remove any other A, CNAME or URL redirect records on @ and www, because they would clash with these. If I am switching email provider, please also remove my old MX records and my old SPF record (the TXT record that starts with v=spf1), so the email records below are the only ones left. Please make sure the domain uses your own default nameservers. Thank you.
[paste your records here: Type, Host, Value, and Priority for MX records]